Elite Force II – Walkthrough
by Ulf Norlinger
ulf.norlinger <at> swipnet.se
24/7/2003
Don’t miss the opportunity to refresh your skills in the Training Program.
NOTE: The wave functions noted below seem to vary between sessions
NOTE2: I didn’t find all the ships and secrets. So if you want to find them, explore a bit yourself.
INFORMATION GATHERING MISSION
Objective: Report to Sickbay
Go to the Sickbay.
Objective: Research in the Library
Take the lift up to deck eleven, the Library. You will meet Telsia just outside the library door. She asks you a question. If you want to keep the good relation with her, the best answer is “I would’nt mind having you help me do some research on the Attrexians.”.
When you leave the Library, you will get a new objective. But before you take the lift, continue through the corridor to the unlabeled door at the end. Take the stairs down to the laundry to get a ship.
Objective: Meet in the Briefing Room
Take the lift to Hazard-Ops.
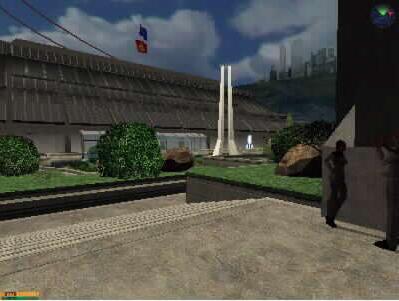
MISSION 5: Discovery <Alien Planet>
Objective: Proceed to lifeforms
You will start from the alien shuttle craft. Climb up to the arched stone bridge in front of you. If you walk on it to the other side you will find a ship. Proceed over the other bridge to the camp.
Objective: Restore Power to Unlock Doors
From there, enter the cave. You are now exiting the area. Continue until you arrive at the ancient ruins. Go to the Door Panel and use your tricorder as usual. You will get a new objective. If you now use your tricorder’s Structure Integrity Mode, you will see a weakening in the left wall behind you. Use your phaser to open a hole in the wall, and crouch through it. On the other side you can find steplike ledges on the building to the right leading up to the top of the wall. When you are at the top, carefully follow the ledge to the other side. Jump down to the white mark. Follow the ledge around the corner, then jump down on the annex below, and then the steps to the left of the annex. On the open place, fire at the idryllglicium containers beside the tall column. The explosion will make the column fall over a nearby wall and make an opening in it. Go through it. Enter the building, and walk through the halls until you come to the resupply terminals. Proceed out to the open place. Ready your Arc Gun, as you will meet your first aliens as soon as you go down the stairs. Go over the open place to the door on the other side. Inside you will find the Auxillary Power Controls. Use your tricorder to modulate the wave (1, 1, 5). After the power is restored, return to the main entrance (outside which your collegues are).
Objective: Find Idryll Scouting Party
After you have fight off the attacking aliens the port will open and your collegues will join you. Go up the long stairs to the left, and use your tricorder on the Door Panel. Continue up the stairs to the open place. Resupply at the terminals there. Follow the stairs up to the last level. On the left side you have unstabled ground, so first blow out the weakened pieces with yout phaser. You can now jump on the remaining stable pieces, but it is better to use the ledge to the right. If you fall down, you can blow a hole in the wall to the left. When you have blown out the last pieces, a wooden container will raise at the far end. Blow it up with your phaser and pick the ship. Enter the door to the right, and walk until you come to a Door Panel. Use the tricorder and open the door beside you, and let your collegues in. When you are on your way to pass the door you entered through you will find the missing Scouting Party. When you have passed the door, turn right and proceed until you come to another door (right in front of you). Wait to enter the door, until Chell has encrypted the code on the Door Panel. Proceed to a bridge. Activate the bridge through the Bridge Control Panel. You will see three force field tiles in groups slowly moving to the other side. Place yourself at the edge, and when the first force field tile appears in front of you, step out on it and try to keep yourself on the middle tile as the tiles are moving to the other side. Proceed into a room with resupply terminals. Then go down the stairs until you arrive in a room with the Bridge Auxillary Controls. Activate the bridge and you will soon be joined by your group members. Continue through next door, and down the stairs. Resupply at the terminals at the ground level. Go to the door at the far right. Inside it you can find a ship. Walk over the open place to the main entrance. Open the gate at the Door Panel. However, the gate will collapse and you are attacked by the Queen Bug. Strafe from left to right while you are shouting at her. If smaller bugs attack you, run back to the terminals and fight off them from there. Then return to the big bug. When the Bug is defeated, go through the gate to the lift. You are now leaving this area.
Objective: Destroy Turrets
The big hall you will arrive in is defended by turrets, so take out them. You have two resupply terminals on both sides of the right door. Proceed through the door in front of the lift (not the lowered one) and then to the next big hall.
Objective: Seal Gas Vents
However, before you enter, switch the mode on your tricorder to Trace Gas Mode. Monitor where the gas comes from, and seal the vents with your phaser.
Objective: Deactivate Trip Wires
Then continue through the door on the opposite side. You will soon leave the area, and enter into smaller corridors. After a while you come to a long bridge. Before walking any further, set your tricorder to Bio Scan Mode. You have to avoid the damaging trip wires. When you come to the force field, turn it off along with the trip wires through the Security Panel to the right. You will now be separated from the rest of your team.
Objective: Reunite with your Team Members
Proceed to the room ahead, and take out the turret above the containers with aliens (at the right). Behind the big machine in the center you can find a secret area. To the right of the containers you have a weakening in the wall. Blow a hole there and pick up the ship. Now, jump over the containers, and place yourself on one of the moving cylinders. Follow it up to the ledge on the other side. Jump off before it begins moving downwards. Resupply at the terminals and then proceed through the door. Take out the turret in the other corner of the room. Then again place yourself on a moving cylinder. When you are at the top jump off to the left. Jump down on the slanted cylinder, and then onto the ramp. Activate the lifts through the Security Panel on the far end of the ramp. Jump down on the roof on one of the lifs, and follow it up to the third ledge. Jump off, and pick up 150 Idryllium energy. Then take another lift down to the ramp you came from. Climb into the low gate and pick up more Idryllium energy at the end. Return to the panel. From there take out the turret above the door in the left corner. Then jump up on the railing behind the panel, then up to the top cylinder. From there, jump to the ledge leading up to the door (These jumps can be difficult. If you have problems with this, try to move backwards as much as possible on both the railing and the cylinder before the jumps. After each short movement backwards. Save. Then load the last one where you did’nt fell off. Now you can take a better run). Go through the door and then to the Security Panel. This will activate a horizontal lift. Jump onto the roof of one of the lift cages and follow it to the other side of the room. Jump off onto the ramp when it stops. Climb up the ladder. You will now arrive on a similar bridge as the one where you were separated from your team members. Turn on your tricorder’s Bio Scan mode. Follow the bridge and try to avoid the trip wires. At the next forcefield, destroy the hatch on the floor with your phaser. Climb down the ladder and then up the ladder on the other side. Continue through the door. Take out the turret behind the second door. Resupply at the terminals beside the door. Proceed to the Gas Vents Control. Use your tricorder to modulate it. When the cylinders raise from the floor, seal the vents with your phaser. To unlock the door ahead of you, you must run over the bridge to the right. I say run, as this stage is very time critical. It is very difficult to know when to start the run over the flashing forcefield tiles (seemingly at random). But a good method, that worked for me, is to continously quicksave until the tiles cover the whole bridge (this happens, once in a while). Then load the saved game, which was saved just before the bridge was covered, and immediately run to the other side. You may be forced to make a jump at the end to make it. On the ramp on the other side of the bridge you have to take out two turrets. Then use your tricorder on the Security Panel. The bridge will now work and you can also take the door to the right. After you entered the corridor behind the door, you will exit the area. After passing through the next door you are back at the big room with the lift you all arrived in. You will also be reunited with your team members.
Proceed through the door where the resupply terminals are. In the next room, look for a moment at the beautiful Idryll painting on the wall, before proceeding up the stairs. After entering the door to the right you are exiting the area. Continue through the corridors and enter into a big room. Resupply at the terminals to the left and right.
Objective: Destroy the Turrets
Go up the stairs to the console above. Place yourself on the circle in the center of the room and take out the turrets from there (arranged in a circular pattern on the roof above you) to protect Chell.
Objective: Find the missing Idryll Archeologists
When he is safe, continue up the stairs and take the door on the other side of the room. In the next room you will find the missing archeologists.
Objective: Find Idryll son
Return to the door you came out from. To the left from there you can find a secret area. Then go down the stairs to the left of the archeologists and take the lift to the room below. Destroy the turrets. Take out the weakened door to the right to find a secret area. Resupply at the terminals at the left door. Then enter into the next corridor. You will arrive at a room with a round platform. Ready you assault rifle as you will meet Basher (a dangerous beast ?). If you need, use the energy terminal on the platform. After the alien is defeated take the ladder, to the left of the door to the right. On the fan under the second platform you will find a ship. Return to the first platform and use your tricorder on the Bridge Control. This will lower a bridge. Proceed to the next platform. In the room to the left you will find Krindo.
INFORMATION GATHERING MISSION
Objective: Talk with Kleeya about the Idryll
Before going to Kleeya, talk with Telsia on the Bridge. If you want her to keep her good attitude against you, the best answers to her statements is 1. “Good Point” 2. “You may be right. But will the Captain see it that way?” (Telsia doesn’t like that you will speak to Kleeya ?). Take the lift to Hazard crew quarters. Before entering Kleeyas room, take the door before to ensign Thompson to get a ship. Next, visit Kleeya. If you want a future relationship with the beautiful and sensual Kleeya, reply with “Perhaps I can. Come with me to Stellar Cartography.”, otherwise you will go on with your relationship with your kindred soul Telsia.
If you gave a negative answer here, you will get a new objective.
Objective: Go to Telsia’s quarters
Go to Telsia’s quarter and tell her how beautiful she is. Reply with “Things have been hectic”, on her second statement.
Objective: Report to the Bridge
Take the lift to deck one, Bridge.
Objective: Meet Korban in the Armory
Take the lift to deck eight, Armory.
Objective: Train with the Grenade Launcher
MISSION 6: Destruction <Enterprise-E>
Objective: Meet with Korban and give assistance
Leave the Transporter room. Continue through the corridor to the right until you arrive at the Cargo Bay door at the right. Enter the Cargo Bay and fight off the Idryllian invaders. Blow out the storage container at the middle on the left wall. Pick up the ship. Climb up the ladder on the other side. Resupply at the terminals on the ramp, next to the ladder. Run to Korban and fight off the last invaders in the Cargo Bay.
Objective: Meet with Jurot and give assistance
Enter the Jefferies tube to the left of the Cargo Bay door. Crouch through the tube and climb down the ladder after the exit. Enter the next Jefferies tube and climb up the ladder at the exit. Enter into the Jefferies tube again, and turn right at the junction. Go through the hole to the right at the far end. Follow the broken pipe and jump down through the next hole to the floor below. Resupply at the terminals at the door. Then proceed along the corridor. Enter the Jefferies tube next to Tuvok. Turn left at the junction. You will now arrive at the Armory. Fight off the Idryllians, then hurry out the door to the left to give Jurot your assistance. Cross the corridor and take the Sick Bay door. Fight off the Idryllians in Sick Bay. Resupply at the terminals, then take the Jefferies tube to the right of Jurot. You will now exit the area.
Objective: Get to main engineering and give assistance
Climb down the ladder and enter the next tube. You will arrive in a small Cargo Bay. Resupply at the terminals next to the door at the left side of the room. Then go through the corridor, and turn left. Turn right at the big door and take the next door to the left. You will now enter Engineering. Prepare for a hard fight.
Objective: Secure the area of all Idryll Invaders
Before you go to Barclay, climb up the stairs to the left. Before going into the Jefferies tube, notice that you have an energy terminal to the left and right of Barclay. They may come in handy later (If you have time to use them). Enter the tube to get a ship next to the ladder. Ready your weapon of choice (I chose the Enh. Compression Rifle’s primary mode). Return to Barclay. When the invaders arrive, move quickly around and kill them as fast as you can. You need time to stabilize the warp-core later (About a centimeter left on the Warp Core Heat bar).
Objective: Bleed energy from Warp Core
Use your tricorder on the Warp Core Energy Panel (The big console where you found Barclay when you entered the room) and connect the circuits.
Objective: Eject the Warp Core
Then you must hurry to the Warp Core Eject Panel (Directly to the left of the left ladder). Enter the eject code using the tricorder (945912).
Objective: Get to the bridge and give assistance
Before you take the lift up to the bridge, it can be a good idea to resupply at the terminals in the small cargo bay you were in earlier.
You will now exit the area. Protect Picard from the Idryll Invaders.
MISSION 6: Remove and Disable <Enterprise-E Hull>
Ready your Compression Rifle and open the hatch above you, using the Use-key.
Objective: Clear Hull of Idryll Saboteurs
This is a rather difficult objective. Use the direction arrows to quickly locate the three devices. Take out the device directly to your left first. After you have killed the Idrylls outside the forcefield circle make a jump (spacebar) and kill the invader inside the forcefield with your Sniper. If you are lucky you can land inside the circle on the same jump. Then disable the device with your tricorder (The bar shouldn’t have progressed more than a third of its length. Otherwise, retry. Save after each sabotaged device). Take out the rest of the invaders outside the circles with your Sniper from a safe distance, and then the one(s) inside the circles the same way as you did for the first circle.
Objective: Disable the Command Ship
Use the big cannon to shot at the Command Ship. Target the red reticle on the ship. It helps, if you know that the ship first comes from right ahead, then from the left and finally from the right. Don’t bother about the capital ship’s hull integrity. The important thing, is that you shot at the “Bull’s Eye” to disable the ship’s engines and weapon systems.
MISSION 7: Search and Rescue <Attrexian Colony>
Objective: Gain access to colony
After you have landed on the landing pod, take the bridge to the big entrance door. Before you are at the door, take the ladder down to the right, and then follow the right coust to find a secret area. Return to the big door. Shot at the weakened clamps. You need to enter the security code, so go back to the landing pod and enter the tower to the right. Use your tricorder on the Security Panel. Also, resupply at the terminals. On the way back a hole opens in the bridge, so you have to jump over it (I jumped from the railing to the right to get height). Enter the storage room ahead.
Objective: Help Jurot Restore Power to Door
Above the containers to the left there is a small hole with grating. Take out the grating and enter the narrow tube. Follow the tube. Before the second turn right, blow a hole in the weakened floor, and follow the tube down to come to a secret area. Return, and pass the second turn right and take out the grating ahead. Jump down on the bridge, and resupply at the terminals. Cross the bridge and walk up the stairs to the left. Go up the ramp at the right and proceed to the Security Panel on your right side. Use your tricorder on it and get a new objective.
Objective: Locate Attrexian Engineer
Continue on the ramp and down the street on your left. To the right you have some containers, and behind them a weakened wall. Blow out the Idryllglicium container to open a hole behind the containers. Go in there and find a secret area. At the far left end of the street you can jump down in a container and find a new secret area. Go through the corridor where you defeated the bat. Turn left and take out the weakened door with you phaser. Visit the trapped Attrexians inside. Then return to the corridor you came from and proceed ahead. You will arrive at a room. At the left corner you will find some containers, and behind them the engineer. Protect him as you go back to the Security Panel (You can take the door to the right). Activate the system together with the engineer who is at the other panel.
Objective: Help Trapped Attrexians
Go back to the trapped Attrexians.
Objective: Follow Attrexian to Sewer Entrance
Follow the Attrexian female to the sewer. Explore the area first to find some energy. Restore your health at the terminal to the right of the Attrexian. As soon as you open the door nextbye, you will be attacked by a dangerous beast (Quadruped). After you have defeated him, fire at the hanging pipes. They will fall down and open a hole to the sewer beneath.
Objective: Enter Sewers
Jump down the hole and onto the fallen pipes. You will now exit the area.
Objective: Reunite with Team
Follow the ramps until you see two terminals. Resupply, and proceed up the stairs. Turn right onto the next set of ramps, and hold to the right until you arrive at a door (opposite to a big fan). When you try to open the door you get a new objective. Enter the tube where the fan is and check the port-folio in the water on the other side (Use your Use-key).
Objective: Restore Power to Maintenance Systems
Proceed through holding to the right. Next to a fan, cross the bridge, and to the right, on the wall ahead of you blow a hole in the weakened wall. Follow the corridor to the sewer, turn right and pick up the extra shielding. If you jump into the water you will also find another brief-case. Go back to the fan, and crouch to the other side. There you will find the Attrexian Systems Panel. This will activate the power systems. Exit through the door, and turn left. Proceed to the door near the first fan (avoid to go near the fan). Go through it and resupply at the terminals. Activate the Door Panel. Go back, follow the right wall until you are below the room with the door panel (You can see it through a grating). Jump into the water at the ladder, walk right ahead, and check the port-folio. Return, climb up the ladder, and proceed along the right wall until you arrive at two terminals. Resupply. Cross the nearby bridge, and follow the right wall to a corridor. Go through it. Go down the stairs to another sewer. Turn immediately to the right and jump in the water. Check another port-folio. Climb up the ladder. Follow the ramp to the stairs. At the stairs jump up to the ramp at the right, and follow the ramp to its end. There you will find a ship. Return to the stairs. Go up the stairs and resupply at the terminals. Proceed until you arrive at your collegues. However, just before you reach them, the bridge will collapse and you will fall into the water. Defeat the beast, and then release the ladder at the terminal. Climb up the ladder and then go on through the nearby door.
Objective: Rescue Trapped Attrexians
Jump into the water ahead of you and check the port-folio. A door will now open elsewhere. Climb up the ladder, and take the door to the right from the door you entered through. Hold left and proceed to the last room with no appearent exit. Fire at the Idryllglicium container at the farther wall. A hole will open in the wall. Continue to the Attrexians. Before you leave them, jump over the water, and look behind the containers. You will find a ship. Return to the Attrexians.
Objective: Enter the Factory
Activate the ladder at the Release Ladder Terminal (at the door). Proceed through the door and climb up the ladder on the other side of the room. Take the corridor to the next door. You will now leave the area. On the open place, go to the dead Attrexian ahead and resupply at the terminals. Cross the ground and enter the door on the other side. Pass through the storage room, and enter the open place. Proceed up to the platform, and resupply at the terminals. Jump down, and take the lifting crane’s magnet up to the ledge to the right. Jump off, when the magnet is about to go back. In the left corner on the ledge you will find a ship. Jump down on the port-folio below, then take the fed ammo. Go over the place to the door on the other side. When you have passed through it, you will exit the area. Enter the Factory, and turn left for resupplying at the terminals. Then take the corridor to the right of the door you came through. Use your tricorder at the Lift Control Panel. You will now be given a new directive.</p>
Objective: Restore Power to Lift
You must now pass through where the horizontal flames are. Take one flame at a time, step off the roll band between each flame, and then step on the band for the next flame. Take the door to the right and resupply if you need. Then take the stairs up to the ramp. Go to the farther Attrexian Systems Panel and activate the lift.
Objective: Explore the Factory
Return to the room where you resupplied. Jump down the new hole in the floor. After you have fight off the attack (preferably from the corner ahead), turn on your night vision and proceed through the darkness. Climb up the ladder on the other side. And when you have passed the door activate the Lift Control (where you were before) which is now functional. Take the lift up. The lift will stop between two floors, so you have to blow out the hatch on the floor. Take the ladder down to the next floor, and open the lift door with the control. Jump down to the lift exit. Proceed through the corridor, and then the ramp to the corner. Open the door (without any light above) and resupply at the terminals. Now, go on to the three big punches. You have to jump over these punches at the right time. Quicksave before each time the first punch raises (Only one time is it correct to make the jumps). Then jump over all three. It is important that you jump before the punch ahead of you is at its top. Resupply at the terminals on the other side, then proceed through the door. Follow the ramps up to the highest. Be prepared to meet a beast. Back off, and use your Assault Rifle’s secondary mode. Proceed to the door on the left side. Climb up the ladder. On the way up you can pick some Idryllian energy on a pipe to the left. Take the door at the top of the ladder. Follow the ramp to the other side and take the door there. Then proceed on the next ramp to the end. There you have two resupply terminals. Turn left and enter the room with the dying Attrexian female (Before you enter, turn on your Gas Trace Mode on the tricorder). Seal the gas vents ahead of you, then go on to the other ramp one the other side of the room. Take first the door to your right, to pick up a ship. Then take the other door. You will meet a dying Attrexian. Before going through the next door, resupply at the terminals on the ramp to the left. You will now exit the area. Go outdoors, next to the landing pod, and take the lift down. Ready your favourite weapon (eg. either the Assault Rifle or Grenade Launcher) and prepare for a hard fight against a beast. After you have defeated him, resupply at the terminals in front of the lift.
Objective: Investigate Shuttle crash site
Objective: Find Idryll Man
Take the other lift down. And then resupply at the terminals. Go to the big door in the other side of the room. After passing it, follow the right wall to the corner to get a ship. Then go back to the door you exit from, and take the door across the open place, and to the left. Go through the next corridor and into next open place. Take to the left and the door with a red light above to get a ship. Proceed back the street and resupply at the terminals to the left. Then go and see the crashed shuttle.
MISSION 8: Payback <Ancient Idryll Planet>
Objective: Locate Krindo
From the crashed shuttle, follow the track to the ammo depot. Continue on the track to the next depot. From there, proceed slowly with your Sniper ready to the bridge ahead. Take the left track and pass the bridge. On the next bridge ahead you have to take out two snipers (on both sides of the hole in the bridge). Avoid to use the Sniper for the enemies transporting in. In the tower to the left of the destroyed bridge ahead, take out the sniper. To the right you have a depot. Visit it. From there you can take out the sniper on the next broken bridge ahead (to the right of the hole). Proceed along the right track, and take out the sniper in the tower on the broken bridge. Walk along the track and eliminate the sniper in the tower behind the depot. From the depot take out the sniper in the tower to the left of the bridge leading to the fortress. Climb up the ruins to the left of the tower to find a secret area. Blow out the Idryllglicium container to find a ship. Return to the bridge (proceed and stop at each arc). Take out the sniper between the two cone like towers on the fortress’ roof (There are four such towers with a sniper between). Walk up the stairs and enter the main entrance. You will now leave the area. Resupply at the terminals. Turn right when you exit the door and run to the far bridge. From there, take out the sniper behind the containers. Then modulate at the Bridge Control. You have to modulate two times. Return to the other bridge. Before using the Bridge Control, take out the guard with your sniper at the entrance on the other side. Walk over the bridge and take the path to the left. Eliminate the sniper in the tower. Proceed to the right and walk over the bridge leading to two resupply terminals. Continue to the shuttle pod, and pass the shuttle on the right side. Eliminate the sniper in the tower to the left. Go back, and follow the shuttle along the left side. Take out the sniper on the roof to the left of the tower. Then cross the main bridge. Eliminate the sniper to the right of the tower to the left. When you are about at the middle of the bridge, it will collapse, and you will fall into the basin below. Use the two terminals in two corners if you need. You will now encounter three Leviathans in succession. The best approach is to take cover behind one of the columns, and use a hit-and-hide strategy. The best weapon as usual is the Assault Rifle’s secondary mode. When the dragons are defeated go to the big door. You will now
be taken to Krindo. The best answer to his question is:”We don’t leave out hostages”.
Objective: Rendezvous with Krindo and escape the facility
Take the lift down. On the way over the bridge you will meet a beast who made a hole in the bridge. After defeating the beast, you must jump over the hole (The easiest place to do that is at the left side). Proceed and turn right at the junction. Behind the next door you can resupply. Then go on on the bridge until you meet a new beast near the dead idrylls (You can, however, avoid him if you jump up to the ledges to the left and continue to the Idrylls). Proceed until a hole suddenly opens in the bridge. Jump down on the tree to the right, and then to the bridge under the bridge you jumped off from. Jump on the tree ahead of you. Walk on it passed the hole, and jump off at the other side. Proceed to the terminals, and then climb up the ladder. Follow the corridors until you exit the area. Soon you will enter a big room. Activate the Lift Panel, and take the lift up. Then turn right into the corridor. Before taking the lift down to the next floor, resupply (You can also take out the beasts down there with your sniper). You will now enter a big room where you can see Krindo at the far side. On either side of the door you have also two resupply terminals. They can come in handy later. A hard fight awaits against a Stalker (Shapeshifter). Run to the Health terminal and place youself in the corner. After Stalker is eliminated, take the lift up together with Krindo. You will now leave the Planet in Krindo’s shuttle.
|

